Recherche avancée
Médias (16)
-

#7 Ambience
16 octobre 2011, par
Mis à jour : Juin 2015
Langue : English
Type : Audio
-

#6 Teaser Music
16 octobre 2011, par
Mis à jour : Février 2013
Langue : English
Type : Audio
-

#5 End Title
16 octobre 2011, par
Mis à jour : Février 2013
Langue : English
Type : Audio
-

#3 The Safest Place
16 octobre 2011, par
Mis à jour : Février 2013
Langue : English
Type : Audio
-

#4 Emo Creates
15 octobre 2011, par
Mis à jour : Février 2013
Langue : English
Type : Audio
-

#2 Typewriter Dance
15 octobre 2011, par
Mis à jour : Février 2013
Langue : English
Type : Audio
Autres articles (12)
-
Support de tous types de médias
10 avril 2011Contrairement à beaucoup de logiciels et autres plate-formes modernes de partage de documents, MediaSPIP a l’ambition de gérer un maximum de formats de documents différents qu’ils soient de type : images (png, gif, jpg, bmp et autres...) ; audio (MP3, Ogg, Wav et autres...) ; vidéo (Avi, MP4, Ogv, mpg, mov, wmv et autres...) ; contenu textuel, code ou autres (open office, microsoft office (tableur, présentation), web (html, css), LaTeX, Google Earth) (...)
-
Supporting all media types
13 avril 2011, parUnlike most software and media-sharing platforms, MediaSPIP aims to manage as many different media types as possible. The following are just a few examples from an ever-expanding list of supported formats : images : png, gif, jpg, bmp and more audio : MP3, Ogg, Wav and more video : AVI, MP4, OGV, mpg, mov, wmv and more text, code and other data : OpenOffice, Microsoft Office (Word, PowerPoint, Excel), web (html, CSS), LaTeX, Google Earth and (...)
-
Encoding and processing into web-friendly formats
13 avril 2011, parMediaSPIP automatically converts uploaded files to internet-compatible formats.
Video files are encoded in MP4, Ogv and WebM (supported by HTML5) and MP4 (supported by Flash).
Audio files are encoded in MP3 and Ogg (supported by HTML5) and MP3 (supported by Flash).
Where possible, text is analyzed in order to retrieve the data needed for search engine detection, and then exported as a series of image files.
All uploaded files are stored online in their original format, so you can (...)
Sur d’autres sites (4915)
-
Subtitling Sierra RBT Files
2 juin 2016, par Multimedia Mike — Game HackingThis is part 2 of the adventure started in my Subtitling Sierra VMD Files post. After I completed the VMD subtitling, The Translator discovered a wealth of animation files in a format called RBT (this apparently stands for “Robot” but I think “Ribbit” format could be more fun). What are we going to do ? We had come so far by solving the VMD subtitling problem for Phantasmagoria. It would be a shame if the effort ground to a halt due to this.
Fortunately, the folks behind the ScummVM project already figured out enough of the format to be able to decode the RBT files in Phantasmagoria.
In the end, I was successful in creating a completely standalone tool that can take a Robot file and a subtitle file and create a new Robot file with subtitles. The source code is here (subtitle-rbt.c). Here’s what the final result looks like :

“What’s in the refrigerator ?” I should note at this juncture that I am not sure if this particular Robot file even has sound or dialogue since I was conducting these experiments on a computer with non-working audio.
The RBT Format
I have created a new MultimediaWiki page describing the Robot Animation format based on the ScummVM source code. I have not worked with a format quite like this before. These are paletted animations which consist of a sequence of independent frames that are designed to be overlaid on top of static background. Because of these characteristics, each frame encodes its own unique dimensions and origin coordinate within the frame. While the Phantasmagoria VMD files are usually 288×144 (which are usually double-sized for the benefit of a 640×400 Super VGA canvas), these frames are meant to be plotted on a game field that was roughly 576×288 (288×144 doublesized).
For example, 2 minimalist animation frames from a desk investigation Robot file :

100×147
101×149As for compression, my first impression was that the algorithm was the same as VMD. This is wrong. It evidently uses an unmodified version of a standard algorithm called Lempel-Ziv-Stac (LZS). It shows up in several RFCs and was apparently used in MS-DOS’s transparent disk compression scheme.
Approach
Thankfully, many of the lessons I learned from the previous project are applicable to this project, including : subtitle library interfacing, subtitling in the paletted colorspace, and replacing encoded frames from the original file instead of trying to create a new file.Here is the pitch for this project :
- Create a C program that can traverse through an input file, piece by piece, and generate an output file. The result of this should be a bitwise identical file.
- Adapt the LZS compression decoding algorithm from ScummVM into the new tool. Make the tool dump raw Portable NetMap (PNM) files of varying dimensions and ensure that they look correct.
- Compress using LZS.
- Stretch the frames and draw subtitles.
- More compression. Find the minimum window for each frame.
Compression
Normally, my first goal is to decompress the video and store the data in a raw form. However, this turned out to be mathematically intractable. While the format does support both compressed and uncompressed frames (even though ScummVM indicates that the uncompressed path is yet unexercised), the goal of this project requires making the frames so large that they overflow certain parameters of the file.A Robot file has a sequence of frames and 2 tables describing the size of each frame. One table describes the entire frame size (audio + video) while the second table describes just the video frame size. Since these tables only use 16 bits to specify a size, the maximum frame size is 65536 bytes. Leaving space for the audio portion of the frame, this only leaves a per-frame byte budget of about 63000 bytes for the video. Expanding the frame to 576×288 (165,888 pixels) would overflow this limit.
Anyway, the upshot is that I needed to compress the data up front.
Fortunately, the LZS compressor is pretty straightforward, at least if you have experience writing VLC-oriented codecs. While the algorithm revolves around back references, my approach was to essentially write an RLE encoder. My compressor would search for runs of data (plentiful when I started to stretch the frame for subtitling purposes). When a run length of n=3 or more of the same pixel is found, encode the pixel by itself, and then store a back reference of offset -1 and length (n-1). It took a little while to iron out a few problems, but I eventually got it to work perfectly.
I have to say, however, that the format is a little bit weird in how it codes very large numbers. The length encoding is somewhat Golomb-like, i.e., smaller values are encoded with fewer bits. However, when it gets to large numbers, it starts encoding counts of 15 as blocks of 1111. For example, 24 is bigger than 7. Thus, emit 1111 into the bitstream and subtract 8 from 23 -> 16. Still bigger than 15, so stuff another 1111 into the bitstream and subtract 15. Now we’re at 1, so stuff 0001. So 24 is 11111111 0001. 12 bits is not too horrible. But the total number of bytes (value / 30). So a value of 300 takes around 10 bytes (80 bits) to encode.
Palette Slices
As in the VMD subtitling project, I took the subtitle color offered in the subtitle spec file as a suggestion and used Euclidean distance to match to the closest available color in the palette. One problem, however, is that the palette is a lot smaller in these animations. According to my notes, for the set of animations I scanned, only about 80 colors were specified, starting at palette index 55. I hypothesize that different slices of the palette are reserved for different uses. E.g., animation, background, and user interface. Thus, there is a smaller number of colors to draw upon for subtitling purposes.Scaling
One bit of residual weirdness in this format is the presence of a per-frame scale factor. While most frames set this to 100 (100% scale), I have observed 70%, 80%, and 90%. ScummVM is a bit unsure about how to handle these, so I am as well. However, I eventually realized I didn’t really need to care, at least not when decoding and re-encoding the frame. Just preserve the scale factor. I intend to modify the tool further to take scale factor into account when creating the subtitle.The Final Resolution
Right around the time that I was composing this post, The Translator emailed me and notified me that he had found a better way to subtitle the Robot files by modifying the scripts, rendering my entire approach moot. The result is much cleaner :

Turns out that the engine supported subtitles all along
It’s a good thing that I enjoyed the challenge or I might be annoyed at this point.
See Also
- Subtitling Sierra VMD Files : My effort to subtitle the main FMV files found in Sierra games.
-
MP4 codec support in Chromium
9 décembre 2015, par StagganWe have integrated Chromium Embedded Framework into our Windows game to allow us to render web pages from within our application, and everything works fine, except MP4 videos.
I understand Chromium does not include this codec due to licensing issues, but can anyone provide details on how we can add support, even if we have to license a codec for it.
All the information we can find seems to be old, and the functions referred to appear to be deprecated... so we are at a bit of a loss.
All the video serving networks we have spoken to appear to serve MP4s.. so changing encoding does not seem to be an option.
Any advice would be greatly appreciated.
Thanks
-
Dreamcast SD Adapter and DreamShell
31 décembre 2014, par Multimedia Mike — Sega DreamcastNope ! I’m never going to let go of the Sega Dreamcast hacking. When I was playing around with Dreamcast hacking early last year, I became aware that there is such a thing as an SD card adapter for the DC that plugs into the port normally reserved for the odd DC link cable. Of course I wanted to see what I could do with it.
The primary software that leverages the DC SD adapter is called DreamShell. Working with this adapter and the software requires some skill and guesswork. Searching for these topics tends to turn up results from various forums where people are trying to cargo-cult their way to solutions. I have a strange feeling that this post might become the unofficial English-language documentation on the matter.
Use Cases
What can you do with this thing ? Undoubtedly, the primary use is for backing up (ripping) the contents of GD-ROMs (the custom optical format used for the DC) and playing those backed up (ripped) copies. Presumably, users of this device leverage the latter use case more than the former, i.e., download ripped games, load them on the SD card, and launch them using DreamShell.However, there are other uses such as multimedia playback, system exploration, BIOS reprogramming, high-level programming, and probably a few other things I haven’t figured out yet.
Delivery
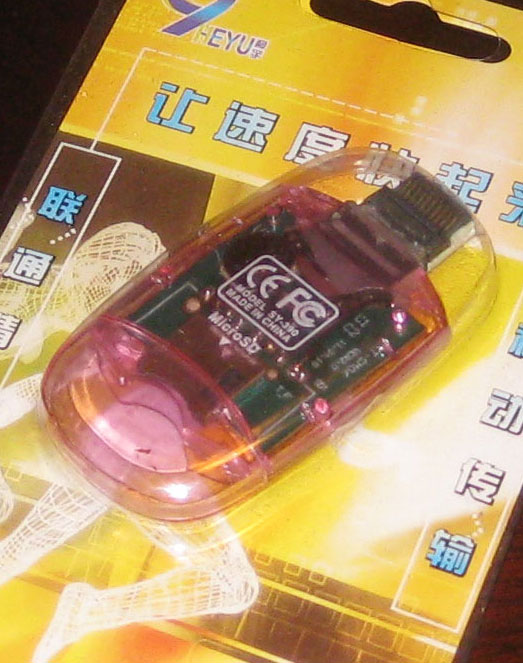
I put in an order via the dc-sd.com website and in about 2 short months, the item arrived from China. This marked my third lifetime delivery from China and curiously, all 3 of the shipments have pertained to the Sega Dreamcast.

Click for larger image
I thought it was very interesting that this adapter came in such complete packaging. The text is all in Chinese, though the back states “Windows 98 / ME / 2000 / XP, Mac OS 9.1, LINUX2.4”. That’s what tipped me off that they must have just cannibalized some old USB SD card readers and packaging in order to create these. Closer inspection of the internals through the translucent pink case confirms this.
Usage
According to its change log, DreamShell has been around for a long time with version 1.0.0 released in February of 2004. The current version is 4.0.0 RC3. There are several downloads available :- DreamShell 4.0 RC 3 CDI Image
- DreamShell 4.0 RC 3 + Boot Loader
- DreamShell 4.0 RC 3 + Core CDI image
Option #2 worked for me. It contains a CDI disc image and the DreamShell files in a directory named DS/.
Burn the CDI to a CD-R in the normal way you would burn a bootable Dreamcast disc from a CDI image. This is open-ended and left as an exercise to the reader, since there are many procedures depending on platform. On Linux, I used a small script I found once called burncdi-dc.sh.
Then, copy the contents of the DS/ folder to an SD card. As for filesystem, FAT16 and FAT32 are both known to work. The files in DS/ should land in the root of the SD card ; the folder DS/ should not be in the root.
Plug the SD card into the DC SD adapter and plug the adapter in the link cable port on the back of the Dreamcast. Then, boot the disc. If it works, you will see this minor corruption of the usual Sega licensing screen :

Then, there will be a brief white-on-black text screen that explains the booting process :

Then, there will be the main DreamShell logo :

Finally, you will land on the DreamShell main desktop :

Skepticism
At first, I was supremely skeptical of the idea that this SD adapter could perform speedily enough to play games reasonably. This was predicated on the observation that my DC coder’s cable that I used to use for homebrew development could not transfer faster than 115200 bits/second, amounting to about 11 kbytes/sec. I assumed that this was a fundamental limitation of the link port.In fact, I ripped a few of my Dreamcast discs over a decade ago and still have those rips lying around. So I copied the ISO image of Resident Evil : Code Veronica — the game I personally played most on the DC — to the SD card (anywhere works) and used the “ISO loader” icon seen on the desktop above to launch the game.
It works :

The opening FMV plays at full speed. Everything loads as fast as I remember. I was quite surprised.
Digression : My assumptions about serial speeds have often been mistaken. 10 years ago, I heard stories about how we would soon be able to watch streaming video on our cell phones. I scoffed because I thought the 56K limitation of dialup modems was some sort of fundamental speed-of-light type of limitation for telephony bandwidth, wired or wireless.
The desktop menu also includes a ‘speedtest’ tool that profiles the write and read performance of your preferred storage medium. For my fastest SD card (a PNY 2 GB card) :

This is probably more representative of the true adapter bandwidth as reading and writing is a good deal faster through more modern interfaces on PC and Mac with this same card.
Look at the other options on the speedtest console. Hard drive ? Apparently, it’s possible, but it requires a good deal more hardware hacking than just purchasing this SD adapter.
Ripping
As you can see from the Resident Evil screenshot, playing games works quite nicely. How about ripping ? I’m pleased to say that DreamShell has a beautiful ripping interface :

Enter a name for the disc (or read the disc label), select the storage medium, and let it, well, rip. It indicates which track it’s working on and the Sega logo acts as a progress bar, shading blue as the track rip progresses.
I’m finally, efficiently, archiving that collection of Sega Dreamcast demo discs ; I’m hoping they’ll eventually find a home at the Internet Archive. How is overall ripping performance ? Usually about 38-40 minutes to rip a full 900-1000 MB. That certainly beats the 27-28 hours that were required when I performed the ripping at 11 kbytes/sec via the DC coders cable.
All is well until I get a sector reading error :

That’s when it can come in handy to have 3 DC consoles (see ?! not crazy !).
Other Uses
There’s a file explorer. You can browse the filesystem of the SD card, visual memory unit, or the CD portion of the GD-ROM (would be more useful if it accessed the GD area). There are FFmpeg files included. So I threw a random Cinepak file and random MPEG-1 file at it to see what happens. MPEG-1 didn’t do anything, but this Cinepak file from some Sierra game played handily :

If you must enter strings, it helps to have a Dreamcast keyboard (which I do). Failing that, here’s a glimpse of the onscreen keyboard that DreamShell equips :

Learning to use it is a game in itself.
There is an option of installing DreamShell in the BIOS. I did not attempt this. I don’t know if it’s possible (not like there’s a lot of documentation)– perhaps a custom BIOS modchip is needed. But here’s what the screen looks like :

There is also a plain console to interact with (better have a physical keyboard). There are numerous file manipulation commands and custom system interaction commands. I see one interesting command called ‘addr’ that looks useful for dumping memory regions to a file.
A Lua language interpreter is also built in. I would love to play with this if I could ascertain whether DreamShell provided Dreamcast-specific APIs.
Tips And Troubleshooting
I have 3 Dreamcast consoles, affectionately named Terran, Protoss, and Zerg after the StarCraft II stickers with which they are adorned. Some seem to work better than others. Protoss seemed to be able to boot the DreamShell disc more reliably than the others. However, I was alarmed when it couldn’t boot one morning when it was churning the previous day.I think the problem is that it was just cold. That seemed to be the issue. I put in a normal GD-ROM and let it warm up on that disc for awhile and then DreamShell booted fine. So that’s my piece of cargo-culting troubleshooting advice.