Recherche avancée
Médias (1)
-

Bug de détection d’ogg
22 mars 2013, par
Mis à jour : Avril 2013
Langue : français
Type : Video
Autres articles (35)
-
Websites made with MediaSPIP
2 mai 2011, parThis page lists some websites based on MediaSPIP.
-
Creating farms of unique websites
13 avril 2011, parMediaSPIP platforms can be installed as a farm, with a single "core" hosted on a dedicated server and used by multiple websites.
This allows (among other things) : implementation costs to be shared between several different projects / individuals rapid deployment of multiple unique sites creation of groups of like-minded sites, making it possible to browse media in a more controlled and selective environment than the major "open" (...) -
Contribute to a better visual interface
13 avril 2011MediaSPIP is based on a system of themes and templates. Templates define the placement of information on the page, and can be adapted to a wide range of uses. Themes define the overall graphic appearance of the site.
Anyone can submit a new graphic theme or template and make it available to the MediaSPIP community.
Sur d’autres sites (5672)
-
PHP and FFMPEG Remove Code in Video [on hold]
6 janvier 2015, par user580950I have set of videos where i need to remove the code ( check below screen grab as an example ), you can see the code in RED .NOt sure if its possible to do it using PHP & ffmpeg or similar to detect a black box or hash key or serial no and blur out.
It must be able to use mpeg-ts file input and output with mpeg-ts.
Detection must be done and blurring must start 5 (configurable) seconds before the black box appears, this means we have to buffer the video and blur out the position where it will appear before it does.

-
Dreamcast SD Adapter and DreamShell
31 décembre 2014, par Multimedia Mike — Sega DreamcastNope ! I’m never going to let go of the Sega Dreamcast hacking. When I was playing around with Dreamcast hacking early last year, I became aware that there is such a thing as an SD card adapter for the DC that plugs into the port normally reserved for the odd DC link cable. Of course I wanted to see what I could do with it.
The primary software that leverages the DC SD adapter is called DreamShell. Working with this adapter and the software requires some skill and guesswork. Searching for these topics tends to turn up results from various forums where people are trying to cargo-cult their way to solutions. I have a strange feeling that this post might become the unofficial English-language documentation on the matter.
Use Cases
What can you do with this thing ? Undoubtedly, the primary use is for backing up (ripping) the contents of GD-ROMs (the custom optical format used for the DC) and playing those backed up (ripped) copies. Presumably, users of this device leverage the latter use case more than the former, i.e., download ripped games, load them on the SD card, and launch them using DreamShell.However, there are other uses such as multimedia playback, system exploration, BIOS reprogramming, high-level programming, and probably a few other things I haven’t figured out yet.
Delivery
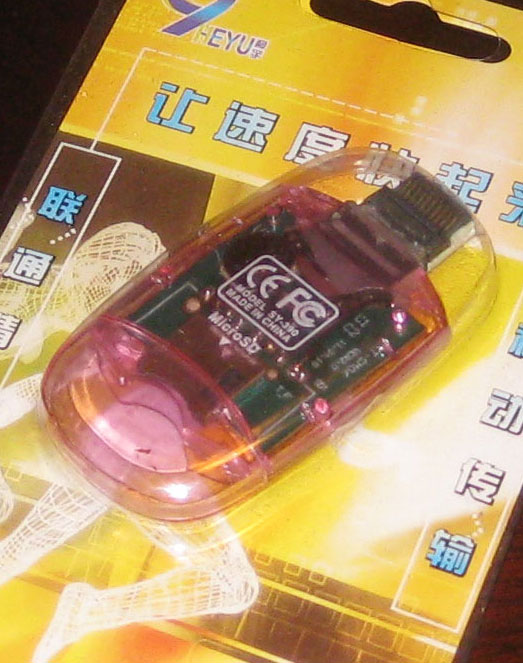
I put in an order via the dc-sd.com website and in about 2 short months, the item arrived from China. This marked my third lifetime delivery from China and curiously, all 3 of the shipments have pertained to the Sega Dreamcast.

Click for larger image
I thought it was very interesting that this adapter came in such complete packaging. The text is all in Chinese, though the back states “Windows 98 / ME / 2000 / XP, Mac OS 9.1, LINUX2.4”. That’s what tipped me off that they must have just cannibalized some old USB SD card readers and packaging in order to create these. Closer inspection of the internals through the translucent pink case confirms this.
Usage
According to its change log, DreamShell has been around for a long time with version 1.0.0 released in February of 2004. The current version is 4.0.0 RC3. There are several downloads available :- DreamShell 4.0 RC 3 CDI Image
- DreamShell 4.0 RC 3 + Boot Loader
- DreamShell 4.0 RC 3 + Core CDI image
Option #2 worked for me. It contains a CDI disc image and the DreamShell files in a directory named DS/.
Burn the CDI to a CD-R in the normal way you would burn a bootable Dreamcast disc from a CDI image. This is open-ended and left as an exercise to the reader, since there are many procedures depending on platform. On Linux, I used a small script I found once called burncdi-dc.sh.
Then, copy the contents of the DS/ folder to an SD card. As for filesystem, FAT16 and FAT32 are both known to work. The files in DS/ should land in the root of the SD card ; the folder DS/ should not be in the root.
Plug the SD card into the DC SD adapter and plug the adapter in the link cable port on the back of the Dreamcast. Then, boot the disc. If it works, you will see this minor corruption of the usual Sega licensing screen :

Then, there will be a brief white-on-black text screen that explains the booting process :

Then, there will be the main DreamShell logo :

Finally, you will land on the DreamShell main desktop :

Skepticism
At first, I was supremely skeptical of the idea that this SD adapter could perform speedily enough to play games reasonably. This was predicated on the observation that my DC coder’s cable that I used to use for homebrew development could not transfer faster than 115200 bits/second, amounting to about 11 kbytes/sec. I assumed that this was a fundamental limitation of the link port.In fact, I ripped a few of my Dreamcast discs over a decade ago and still have those rips lying around. So I copied the ISO image of Resident Evil : Code Veronica — the game I personally played most on the DC — to the SD card (anywhere works) and used the “ISO loader” icon seen on the desktop above to launch the game.
It works :

The opening FMV plays at full speed. Everything loads as fast as I remember. I was quite surprised.
Digression : My assumptions about serial speeds have often been mistaken. 10 years ago, I heard stories about how we would soon be able to watch streaming video on our cell phones. I scoffed because I thought the 56K limitation of dialup modems was some sort of fundamental speed-of-light type of limitation for telephony bandwidth, wired or wireless.
The desktop menu also includes a ‘speedtest’ tool that profiles the write and read performance of your preferred storage medium. For my fastest SD card (a PNY 2 GB card) :

This is probably more representative of the true adapter bandwidth as reading and writing is a good deal faster through more modern interfaces on PC and Mac with this same card.
Look at the other options on the speedtest console. Hard drive ? Apparently, it’s possible, but it requires a good deal more hardware hacking than just purchasing this SD adapter.
Ripping
As you can see from the Resident Evil screenshot, playing games works quite nicely. How about ripping ? I’m pleased to say that DreamShell has a beautiful ripping interface :

Enter a name for the disc (or read the disc label), select the storage medium, and let it, well, rip. It indicates which track it’s working on and the Sega logo acts as a progress bar, shading blue as the track rip progresses.
I’m finally, efficiently, archiving that collection of Sega Dreamcast demo discs ; I’m hoping they’ll eventually find a home at the Internet Archive. How is overall ripping performance ? Usually about 38-40 minutes to rip a full 900-1000 MB. That certainly beats the 27-28 hours that were required when I performed the ripping at 11 kbytes/sec via the DC coders cable.
All is well until I get a sector reading error :

That’s when it can come in handy to have 3 DC consoles (see ?! not crazy !).
Other Uses
There’s a file explorer. You can browse the filesystem of the SD card, visual memory unit, or the CD portion of the GD-ROM (would be more useful if it accessed the GD area). There are FFmpeg files included. So I threw a random Cinepak file and random MPEG-1 file at it to see what happens. MPEG-1 didn’t do anything, but this Cinepak file from some Sierra game played handily :

If you must enter strings, it helps to have a Dreamcast keyboard (which I do). Failing that, here’s a glimpse of the onscreen keyboard that DreamShell equips :

Learning to use it is a game in itself.
There is an option of installing DreamShell in the BIOS. I did not attempt this. I don’t know if it’s possible (not like there’s a lot of documentation)– perhaps a custom BIOS modchip is needed. But here’s what the screen looks like :

There is also a plain console to interact with (better have a physical keyboard). There are numerous file manipulation commands and custom system interaction commands. I see one interesting command called ‘addr’ that looks useful for dumping memory regions to a file.
A Lua language interpreter is also built in. I would love to play with this if I could ascertain whether DreamShell provided Dreamcast-specific APIs.
Tips And Troubleshooting
I have 3 Dreamcast consoles, affectionately named Terran, Protoss, and Zerg after the StarCraft II stickers with which they are adorned. Some seem to work better than others. Protoss seemed to be able to boot the DreamShell disc more reliably than the others. However, I was alarmed when it couldn’t boot one morning when it was churning the previous day.I think the problem is that it was just cold. That seemed to be the issue. I put in a normal GD-ROM and let it warm up on that disc for awhile and then DreamShell booted fine. So that’s my piece of cargo-culting troubleshooting advice.
-
The use cases for a element in HTML
1er janvier 2014, par silviaThe W3C HTML WG and the WHATWG are currently discussing the introduction of a <main> element into HTML.
The <main> element has been proposed by Steve Faulkner and is specified in a draft extension spec which is about to be accepted as a FPWD (first public working draft) by the W3C HTML WG. This implies that the W3C HTML WG will be looking for implementations and for feedback by implementers on this spec.
I am supportive of the introduction of a <main> element into HTML. However, I believe that the current spec and use case list don’t make a good enough case for its introduction. Here are my thoughts.
Main use case : accessibility
In my opinion, the main use case for the introduction of <main> is accessibility.
Like any other users, when blind users want to perceive a Web page/application, they need to have a quick means of grasping the content of a page. Since they cannot visually scan the layout and thus determine where the main content is, they use accessibility technology (AT) to find what is known as “landmarks”.
“Landmarks” tell the user what semantic content is on a page : a header (such as a banner), a search box, a navigation menu, some asides (also called complementary content), a footer, …. and the most important part : the main content of the page. It is this main content that a blind user most often wants to skip to directly.
In the days of HTML4, a hidden “skip to content” link at the beginning of the Web page was used as a means to help blind users access the main content.
In the days of ARIA, the aria @role=main enables authors to avoid a hidden link and instead mark the element where the main content begins to allow direct access to the main content. This attribute is supported by AT – in particular screen readers – by making it part of the landmarks that AT can directly skip to.
Both the hidden link and the ARIA @role=main approaches are, however, band aids : they are being used by those of us that make “finished” Web pages accessible by adding specific extra markup.
A world where ARIA is not necessary and where accessibility developers would be out of a job because the normal markup that everyone writes already creates accessible Web sites/applications would be much preferable over the current world of band-aids.
Therefore, to me, the primary use case for a <main> element is to achieve exactly this better world and not require specialized markup to tell a user (or a tool) where the main content on a page starts.
An immediate effect would be that pages that have a <main> element will expose a “main” landmark to blind and vision-impaired users that will enable them to directly access that main content on the page without having to wade through other text on the page. Without a <main> element, this functionality can currently only be provided using heuristics to skip other semantic and structural elements and is for this reason not typically implemented in AT.
Other use cases
The <main> element is a semantic element not unlike other new semantic elements such as <header>, <footer>, <aside>, <article>, <nav>, or <section>. Thus, it can also serve other uses where the main content on a Web page/Web application needs to be identified.
Data mining
For data mining of Web content, the identification of the main content is one of the key challenges. Many scholarly articles have been published on this topic. This stackoverflow article references and suggests a multitude of approaches, but the accepted answer says “there’s no way to do this that’s guaranteed to work”. This is because Web pages are inherently complex and many <div>, <p>, <iframe> and other elements are used to provide markup for styling, notifications, ads, analytics and other use cases that are necessary to make a Web page complete, but don’t contribute to what a user consumes as semantically rich content. A <main> element will allow authors to pro-actively direct data mining tools to the main content.
Search engines
One particularly important “data mining” tool are search engines. They, too, have a hard time to identify which sections of a Web page are more important than others and employ many heuristics to do so, see e.g. this ACM article. Yet, they still disappoint with poor results pointing to findings of keywords in little relevant sections of a page rather than ranking Web pages higher where the keywords turn up in the main content area. A <main> element would be able to help search engines give text in main content areas a higher weight and prefer them over other areas of the Web page. It would be able to rank different Web pages depending on where on the page the search words are found. The <main> element will be an additional hint that search engines will digest.
Visual focus
On small devices, the display of Web pages designed for Desktop often causes confusion as to where the main content can be found and read, in particular when the text ends up being too small to be readable. It would be nice if browsers on small devices had a functionality (maybe a default setting) where Web pages would start being displayed as zoomed in on the main content. This could alleviate some of the headaches of responsive Web design, where the recommendation is to show high priority content as the first content. Right now this problem is addressed through stylesheets that re-layout the page differently depending on device, but again this is a band-aid solution. Explicit semantic markup of the main content can solve this problem more elegantly.
Styling
Finally, naturally, <main> would also be used to style the main content differently from others. You can e.g. replace a semantically meaningless <div id=”main”> with a semantically meaningful <main> where their position is identical. My analysis below shows, that this is not always the case, since oftentimes <div id=”main”> is used to group everything together that is not the header – in particular where there are multiple columns. Thus, the ease of styling a <main> element is only a positive side effect and not actually a real use case. It does make it easier, however, to adapt the style of the main content e.g. with media queries.
Proposed alternative solutions
It has been proposed that existing markup serves to satisfy the use cases that <main> has been proposed for. Let’s analyse these on some of the most popular Web sites. First let’s list the propsed algorithms.
Proposed solution No 1 : Scooby-Doo
On Sat, Nov 17, 2012 at 11:01 AM, Ian Hickson <ian@hixie.ch> wrote :
| The main content is whatever content isn’t
| marked up as not being main content (anything not marked up with <header>,
| <aside>, <nav>, etc).
This implies that the first element that is not a <header>, <aside>, <nav>, or <footer> will be the element that we want to give to a blind user as the location where they should start reading. The algorithm is implemented in https://gist.github.com/4032962.
Proposed solution No 2 : First article element
On Sat, Nov 17, 2012 at 8:01 AM, Ian Hickson  wrote :
| On Thu, 15 Nov 2012, Ian Yang wrote :
| >
| > That’s a good idea. We really need an element to wrap all the <p>s,
| > <ul>s, <ol>s, <figure>s, <table>s ... etc of a blog post.
|
| That’s called <article>.
This approach identifies the first <article> element on the page as containing the main content. Here’s the algorithm for this approach.
Proposed solution No 3 : An example heuristic approach
The readability plugin has been developed to make Web pages readable by essentially removing all the non-main content from a page. An early source of readability is available. This demonstrates what a heuristic approach can perform.
Analysing alternative solutions
Comparison
I’ve picked 4 typical Websites (top on Alexa) to analyse how these three different approaches fare. Ideally, I’d like to simply apply the above three scripts and compare pictures. However, since the semantic HTML5 elements <header>, <aside>, <nav>, and <footer> are not actually used by any of these Web sites, I don’t actually have this choice.
So, instead, I decided to make some assumptions of where these semantic elements would be used and what the outcome of applying the first two algorithms would be. I can then compare it to the third, which is a product so we can take screenshots.
Google.com
http://google.com – search for “Scooby Doo”.
The search results page would likely be built with :
- a <nav> menu for the Google bar
- a <header> for the search bar
- another <header> for the login section
- another <nav> menu for the search types
- a <div> to contain the rest of the page
- a <div> for the app bar with the search number
- a few <aside>s for the left and right column
- a set of <article>s for the search results
“Scooby Doo” would find the first element after the headers as the “main content”. This is the element before the app bar in this case. Interestingly, there is a <div @id=main> already in the current Google results page, which “Scooby Doo” would likely also pick. However, there are a nav bar and two asides in this div, which clearly should not be part of the “main content”. Google actually placed a @role=main on a different element, namely the one that encapsulates all the search results.“First Article” would find the first search result as the “main content”. While not quite the same as what Google intended – namely all search results – it is close enough to be useful.
The “readability” result is interesting, since it is not able to identify the main text on the page. It is actually aware of this problem and brings a warning before displaying this page :

Facebook.com
A user page would likely be built with :
- a <header> bar for the search and login bar
- a <div> to contain the rest of the page
- an <aside> for the left column
- a <div> to contain the center and right column
- an <aside> for the right column
- a <header> to contain the center column “megaphone”
- a <div> for the status posting
- a set of <article>s for the home stream
“Scooby Doo” would find the first element after the headers as the “main content”. This is the element that contains all three columns. It’s actually a <div @id=content> already in the current Facebook user page, which “Scooby Doo” would likely also pick. However, Facebook selected a different element to place the @role=main : the center column.“First Article” would find the first news item in the home stream. This is clearly not what Facebook intended, since they placed the @role=main on the center column, above the first blog post’s title. “First Article” would miss that title and the status posting.
The “readability” result again disappoints but warns that it failed :

YouTube.com
A video page would likely be built with :
- a <header> bar for the search and login bar
- a <nav> for the menu
- a <div> to contain the rest of the page
- a <header> for the video title and channel links
- a <div> to contain the video with controls
- a <div> to contain the center and right column
- an <aside> for the right column with an <article> per related video
- an <aside> for the information below the video
- a <article> per comment below the video
“Scooby Doo” would find the first element after the headers as the “main content”. This is the element that contains the rest of the page. It’s actually a <div @id=content> already in the current YouTube video page, which “Scooby Doo” would likely also pick. However, YouTube’s related videos and comments are unlikely to be what the user would regard as “main content” – it’s the video they are after, which generously has a <div id=watch-player>.“First Article” would find the first related video or comment in the home stream. This is clearly not what YouTube intends.
The “readability” result is not quite as unusable, but still very bare :

Wikipedia.com
http://wikipedia.com (“Overscan” page)
A Wikipedia page would likely be built with :
- a <header> bar for the search, login and menu items
- a <div> to contain the rest of the page
- an &ls ; article> with title and lots of text
- <article> an <aside> with the table of contents
- several <aside>s for the left column
Good news : “Scooby Doo” would find the first element after the headers as the “main content”. This is the element that contains the rest of the page. It’s actually a <div id=”content” role=”main”> element on Wikipedia, which “Scooby Doo” would likely also pick.“First Article” would find the title and text of the main element on the page, but it would also include an <aside>.
The “readability” result is also in agreement.

Results
In the following table we have summarised the results for the experiments :
Site Scooby-Doo First article Readability Google.com FAIL SUCCESS FAIL Facebook.com FAIL FAIL FAIL YouTube.com FAIL FAIL FAIL Wikipedia.com SUCCESS SUCCESS SUCCESS Clearly, Wikipedia is the prime example of a site where even the simple approaches find it easy to determine the main content on the page. WordPress blogs are similarly successful. Almost any other site, including news sites, social networks and search engine sites are petty hopeless with the proposed approaches, because there are too many elements that are used for layout or other purposes (notifications, hidden areas) such that the pre-determined list of semantic elements that are available simply don’t suffice to mark up a Web page/application completely.
Conclusion
It seems that in general it is impossible to determine which element(s) on a Web page should be the “main” piece of content that accessibility tools jump to when requested, that a search engine should put their focus on, or that should be highlighted to a general user to read. It would be very useful if the author of the Web page would provide a hint through a <main> element where that main content is to be found.
I think that the <main> element becomes particularly useful when combined with a default keyboard shortcut in browsers as proposed by Steve : we may actually find that non-accessibility users will also start making use of this shortcut, e.g. to get to videos on YouTube pages directly without having to tab over search boxes and other interactive elements, etc. Worthwhile markup indeed.