Recherche avancée
Autres articles (74)
-
Creating farms of unique websites
13 avril 2011, parMediaSPIP platforms can be installed as a farm, with a single "core" hosted on a dedicated server and used by multiple websites.
This allows (among other things) : implementation costs to be shared between several different projects / individuals rapid deployment of multiple unique sites creation of groups of like-minded sites, making it possible to browse media in a more controlled and selective environment than the major "open" (...) -
MediaSPIP : Modification des droits de création d’objets et de publication définitive
11 novembre 2010, parPar défaut, MediaSPIP permet de créer 5 types d’objets.
Toujours par défaut les droits de création et de publication définitive de ces objets sont réservés aux administrateurs, mais ils sont bien entendu configurables par les webmestres.
Ces droits sont ainsi bloqués pour plusieurs raisons : parce que le fait d’autoriser à publier doit être la volonté du webmestre pas de l’ensemble de la plateforme et donc ne pas être un choix par défaut ; parce qu’avoir un compte peut servir à autre choses également, (...) -
Les autorisations surchargées par les plugins
27 avril 2010, parMediaspip core
autoriser_auteur_modifier() afin que les visiteurs soient capables de modifier leurs informations sur la page d’auteurs
Sur d’autres sites (7271)
-
Saying Goodbye To Old Machines
I recently sent a few old machines off for recycling. Both had relevance to the early days of the FATE testing effort. As is my custom, I photographed them (poorly, of course).
First, there’s the PowerPC-based Mac Mini I procured thanks to a Craigslist ad in late 2006. I had plans to develop automated FFmpeg building and testing and was already looking ahead toward testing multiple CPU architectures. Again, this was 2006 and PowerPC wasn’t completely on the outs yet– although Apple’s MacTel transition was in full swing, the entire new generation of video game consoles was based on PowerPC.

Click for larger image
I remember trying to find a Mac Mini PPC on Craigslist. Many were to be found, but all asked more than the price of even a new Mac Mini Intel, always because the seller was leaving all of last year’s applications and perhaps including a monitor, neither of which I needed. Fortunately, I found this bare Mac Mini. Also fortunate was the fact that it was far easier to install Linux on it than the first PowerPC machine I owned.
After FATE operation transitioned away from me, I still kept the machine in service as an edge server and automated backup machine. That is, until the hard drive failed on reboot one day. Thus, when it was finally time to recycle the computer, I felt it necessary to disassemble the machine and remove the hard drive for possible salvage and then for destruction.
If you’ve ever attempted to upgrade or otherwise service this style of Mac Mini, you will no doubt recognize the pictured paint scraper tool as standard kit. I have had that tool since I first endeavored to upgrade the RAM to 1 GB from the standard 1/2 GB. Performing such activities on a Mac Mini is tedious, but only if you care about putting it back together afterwards.
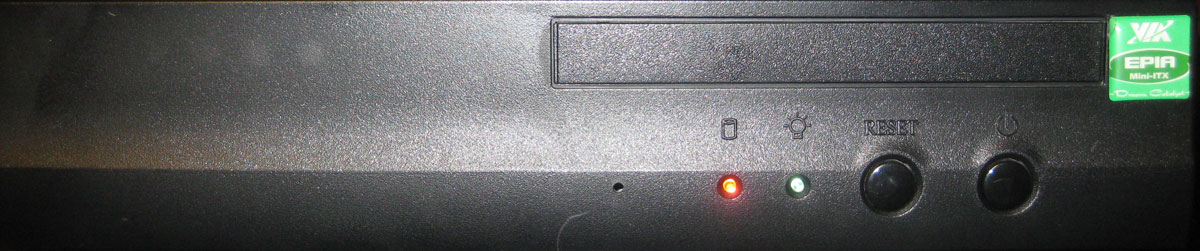
The next machine is a bit older. I put it together nearly a decade ago, early in 2005. This machine’s original duty was “download agent”– this would be more specifically called a BitTorrent machine in modern tech parlance. Back then, I placed it on someone else’s woefully underutilized home broadband connection (with their permission, of course) when I was too cheap to upgrade from dialup.

Click for larger image
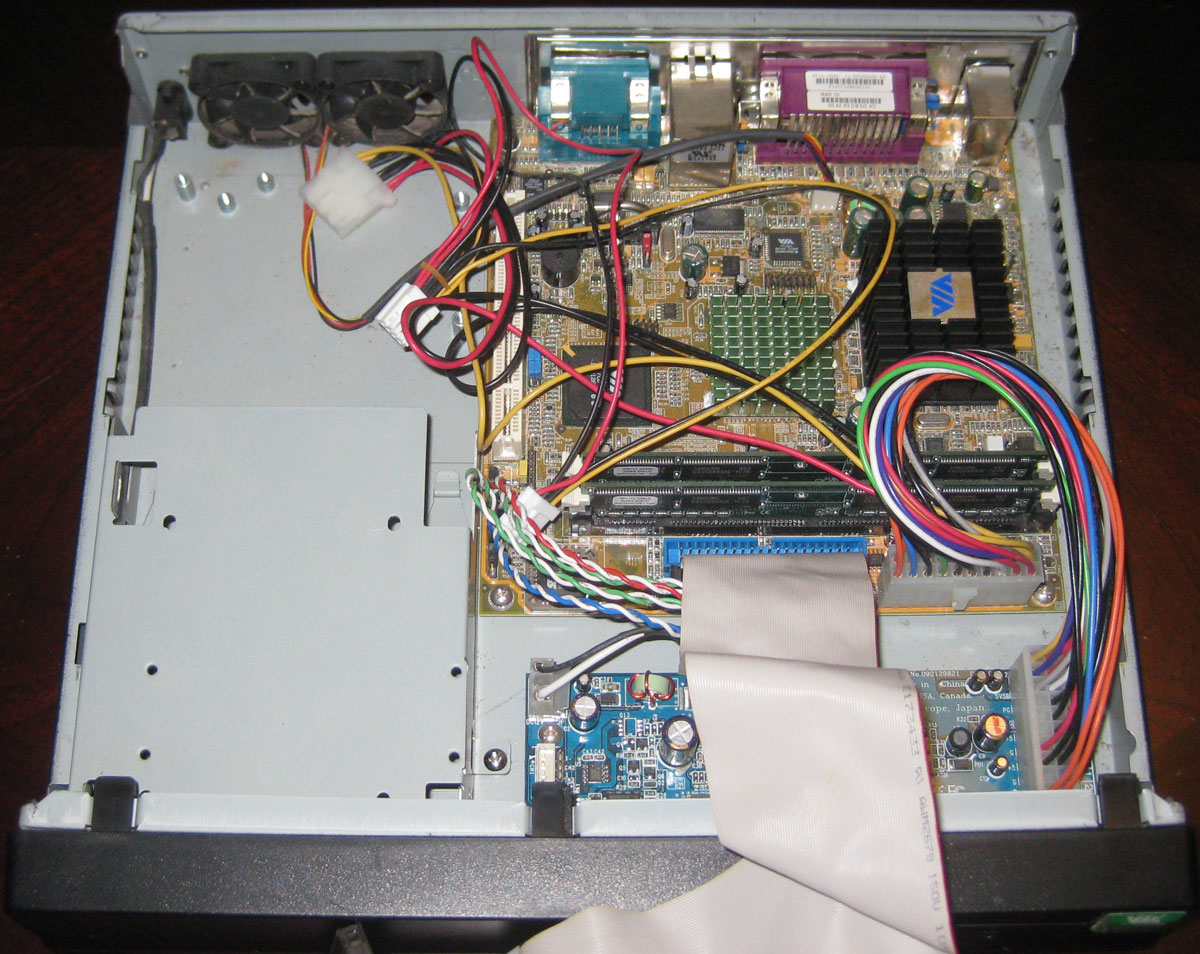
This is a small form factor system from VIA that was clearly designed with home theater PC (HTPC) use cases in mind. It has a VIA C3 x86-compatible CPU (according to my notes, Centaur VIA Samuel 2 stepping 03, flags : fpu de tsc msr cx8 mtrr pge mmx 3dnow) and 128 MB of RAM (initially ; I upgraded it to 512 MB some years later, just for the sake of doing it). And then there was the 120 GB PATA HD for all that downloaded goodness.

Click for larger image
I have specific memories of a time when my main computer at home wasn’t working correctly for one reason or another. Instead, I logged into this machine remotely via SSH to make several optimizations and fixes on FFmpeg’s VP3/Theora video decoder, all from the terminal, without being able to see the decoded images with my own eyes (which is why I insist that even blind people could work on video codecs).
By the time I got my own broadband, I had become inspired to attempt the automated build and test system for FFmpeg. This was the machine I used for prototyping early brainstorms of FATE. By the time I put a basic build/test system into place in early 2008, I had much faster computers that could build and test the project– obvious limitation of this machine is that it could take at least 1/2 hour to build the entire codebase, and that was the project from 8 years ago.
So the machine got stuffed in a closet somewhere along the line. The next time I pulled it out was in 2010 when I wanted to toy with Dreamcast programming once more (the machine appears in one of the photos in this post). This was the only machine I still owned which still had an RS-232 serial port (I didn’t know much about USB serial converters yet), plus it still had a bunch of pre-compiled DC homebrew binaries (I was having trouble getting the toolchain to work right).
The next time I dusted off this machine was late last year when I was trying some experiments with the Microsoft Xbox’s IDE drive (a photo in that post also shows the machine ; this thing shows up a lot on this blog). The VIA machine was the only machine I still owned which had 40-pin IDE connectors which was crucial to my experiment.
At this point, I was trying to make the machine more useful which meant replacing the ancient Gentoo Linux distribution as well as simply interacting with it via a keyboard and mouse. I have a long Evernote entry documenting a comedy of errors revolving around this little box. The interaction troubles were due to the fact that I didn’t have any PS/2 keyboards left and I couldn’t make a USB keyboard work with it. Diego was able to explain that I needed to flip a bit in the BIOS to address this which worked. As for upgrading the OS, I tried numerous Linux distributions large and small, mostly focusing on the small. None worked. I eventually learned that, while I was trying to use i686 distributions, this machine did not actually qualify as an i686 CPU ; installations usually booted but failed because the default kernel required the cmov instruction. I was advised to try i386 distros instead. My notes don’t indicate whether I had any luck on this front before I gave up and moved on.
I just made the connection that this VIA machine has two 40-pin IDE connectors which means that the thing was technically capable of supporting up to 4 IDE devices. Obviously, the computer couldn’t really accommodate that in terms of space or power. When I wanted to try installing a new OS, I needed take off the top and connect a rather bulky IDE CD-ROM drive. This computer’s casing was supposed to be able to support a slimline optical drive (perhaps like the type found in laptops), but I could never quite visualize how that was supposed to work, space-wise. When I disassembled the PowerPC Mac Mini, I realized I might be able to repurpose that machines optical drive for this computer. Obviously, I thought better of trying since both machines are off to the recycle pile.
I would still like to work on the Xbox project a bit more, but I procured a different, unused, much more powerful yet still old computer that has a motherboard with 1 PATA connector in addition to 6 SATA connectors. If I ever get around to toying with Linux kernel development, this should be a much more appropriate platform to use.
I thought about turning this machine into an old Windows XP (and lower, down to Windows 3.1) gaming platform ; the capabilities of the machine would probably be perfect for a huge portion of my Windows game collection. But I think the lack of an optical drive renders this idea intractable. External USB drives are likely out of the question since there is very little chance that this motherboard featured USB 2.0 (the specs don’t mention 2.0, so the USB ports are probably 1.1).
So it is with fond memories that I send off both machines, sans hard drives, to the recycle pile. I’m still deciding on an appropriate course of action for failed hard drives, though.
-
Subtitling Sierra VMD Files
1er juin 2016, par Multimedia Mike — Game HackingI was contacted by a game translation hobbyist from Spain (henceforth known as The Translator). He had set his sights on Sierra’s 7-CD Phantasmagoria. This mammoth game was driven by a lot of FMV files and animations that have speech. These require language translation in the form of video subtitling. He’s lucky that he found possibly the one person on the whole internet who has just the right combination of skill, time, and interest to pull this off. And why would I care about helping ? I guess I share a certain camaraderie with game hackers. Don’t act so surprised. You know what kind of stuff I like to work on.
The FMV format used in this game is VMD, which makes an appearance in numerous Sierra titles. FFmpeg already supports decoding this format. FFmpeg also supports subtitling video. So, ideally, all that’s necessary to support this goal is to add a muxer for the VMD format which can encode raw video and audio, which the format supports. Implement video compression as extra credit.
The pipeline that I envisioned looks like this :

VMD Subtitling Process
“Trivial !” I surmised. I just never learn, do I ?
The Plan
So here’s my initial pitch, outlining the work I estimated that I would need to do towards the stated goal :- Create a new file muxer that produces a syntactically valid VMD file with bogus video and audio data. Make sure it works with both FFmpeg’s playback system as well as the proper Phantasmagoria engine.
- Create a new video encoder that essentially operates in pass-through mode while correctly building a palette.
- Create a new basic encoder for the video frames.
A big unknown for me was exactly how subtitle handling operates in FFmpeg. Thanks to this project, I now know. I was concerned because I was pretty sure that font rendering entails anti-aliasing which bodes poorly for keeping the palette count under 256 unique colors.
Computer Science Puzzle
When pondering how to process the palette, I was excited for the opportunity to exercise actual computer science. FFmpeg converts frames from paletted frames to full RGB frames. Then it needs to convert them back to paletted frames. I had a vague recollection of solving this problem once before when I was experimenting with a new paletted video codec. I seem to recall that I did the palette conversion in a very naive manner. I just used a static 256-element array and processed each RGB pixel of the frame, seeing if the value already occurred in the table (O(n) lookup) and adding it otherwise.
There are more efficient algorithms, however, such as hash tables and trees. Somewhere along the line, FFmpeg helpfully acquired a rarely-used tree data structure, which was perfect for this project.
So I was pretty pleased with this optimization. Too bad this wouldn’t survive to the end of the effort.
Another palette-related challenge was the fact that a group of pictures would be accumulating a new palette but that palette needed to be recorded before the group. Thus, the muxer needed to have extra logic to rewind the file when the video encoder transmitted a palette change.
Video Compression
VMD has a few methods in its compression toolbox. It can use interframe differencing, it has some RLE, or it can code a frame raw. It can also use a custom LZ-like format on top of these. For early prototypes, I elected to leave each frame coded raw. After the concept was proved, I implemented the frame differencing.


Top frame compared with the middle frame yields the bottom frame : red pixels indicate changesEncoding only those red dots in between vast runs of unchanged pixels yielded a vast measurable improvement. The next step was to try wiring up FFmpeg’s existing LZ compression facilities to the encoder. This turned out to be implausible since VMD’s LZ variant has nothing to do with anything FFmpeg already provides. Fortunately, the LZ piece is not absolutely required and the frame differencing + RLE provides plenty of compression.
Subtitling
I’ve never done anything, multimedia programming-wise, concerning subtitles. I guess all the entertainment I care about has always been in my native tongue. What a good excuse to program outside of my comfort zone !First, I needed to know how to access FFmpeg’s subtitling facilities. Fortunately, The Translator did the legwork on this matter so I didn’t have to figure it out.
However, I intuitively had misgivings about this phase. I had heard that the subtitling process performs anti-aliasing. That means that the image would need to be promoted to a higher colorspace for this phase and that the anti-aliasing process would likely push the color count way past 256. Some quick tests revealed this to be the case, as the running color count would leap by several hundred colors as soon as the palette accounting algorithm encountered a subtitle.
So I dug into the subtitle subsystem. I discovered that the subtitle library operates by creating a linked list of subtitle bitmaps that the client app must render. The bitmaps are comprised of 8-bit alpha transparency values that must be composited onto the target frame (i.e., 0 = transparent, 255 = 100% opaque). For example, the letter ‘H’ :
                                  (with 00s removed)
13 F8 41 00 00 00 00 68 E4  |  13 F8 41             68 E4
14 FF 44 00 00 00 00 6C EC  |  14 FF 44             6C EC
14 FF 44 00 00 00 00 6C EC  |  14 FF 44             6C EC
14 FF 44 00 00 00 00 6C EC  |  14 FF 44             6C EC
14 FF DC D0 D0 D0 D0 E4 EC  |  14 FF DC D0 D0 D0 D0 E4 EC
14 FF 7E 50 50 50 50 9A EC  |  14 FF 7E 50 50 50 50 9A EC
14 FF 44 00 00 00 00 6C EC  |  14 FF 44             6C EC
14 FF 44 00 00 00 00 6C EC  |  14 FF 44             6C EC
14 FF 44 00 00 00 00 6C EC  |  14 FF 44             6C EC
11 E0 3B 00 00 00 00 5E CE  |  11 E0 3B             5E CE
To get around the color explosion problem, I chose a threshold value and quantized values above and below to 255 and 0, respectively. Further, the process chooses an appropriate color from the existing palette rather than introducing any new colors.
Muxing Matters
In order to force VMD into a general purpose media framework, a lot of special information needs to be passed around. Like many paletted codecs, the palette needs to be transmitted from the file demuxer to the video decoder via some side channel. For re-encoding, this also implies that the palette needs to make the trip from the video encoder to the file muxer. As if this wasn’t enough, individual VMD frames have even more data that needs to be ferried between the muxer and codec levels, including frame change boundaries. FFmpeg provides methods to do these things, but I could not always rely on the systems to relay the data in all cases. I was probably doing something wrong ; I accept that. Instead, I just packed all the information at the front of an encoded frame and split it apart in the muxer.I could not quite figure out how to get the audio and video muxed correctly. As a result, neither FFmpeg nor the Phantasmagoria engine could replay the files correctly.
Plan B
Since I was having so much trouble creating an entirely new VMD file, likely due to numerous unknown bits of the file format, I thought of another angle : re-use the existing VMD file. For this approach, I kept the video encoder and file muxer that I created in the initial phase, but modified the file muxer to emit a special intermediate file. Then, I created a Python tool to repackage the original VMD file using compressed video data in the intermediate file.For this phase, I also implemented a command line switch for FFmpeg to disable subtitle blending, to make the feature feel like less of an unofficial hack, as though this nonsense would ever have a chance of being incorporated upstream.
At this point, I was seeing some success with the complete, albeit roundabout, subtitling process. I constructed a subtitle file using “Spanish I Learned From Mexican Telenovelas” and the frames turned out fairly readable :

“she cheated on him”

“he’s a scumbag” … these random subtitles could fit surprisingly well !
The few files that I tested appeared to work fine. But then I handed off my work to The Translator and he immediately found a bunch of problems. According to my notes, the problems mostly took the form of flashing, solid color frames. Further, I found tiny, mostly imperceptible flaws in my RLE compressor, usually only detectable by running strict comparison tools ; but I wasn’t satisfied.
At this point, I think I attempted to just encode the entire palette at the front of each frame, as allowed by the format, but that did not seem to fix any problems. My notes are not completely clear on this matter (likely because I was still trying to figure out the exact problem), but I think it had to do with FFmpeg inserting extra video frames in order to even out gaps in the video framerate.
Sigh, Plan C
At this point, I was getting tired of trying to force FFmpeg to do this. So I decided to minimize its involvement using lessons learned up to this point.The next pitch :
- Create a new C program that can open an existing VMD file and output an identical VMD file. I know this sounds easy, but the specific method of copying entails interpreting individual parts of the file and writing those individual parts to the new file. This is in preparation for…
- Import the VMD video decoder functions directly into the program to decode the individual video frames and re-encode them, replacing the video frames as the file is rewritten.
- Wire up the subtitle system. During the adventure to disable subtitle blending, I accidentally learned enough about interfacing to the subtitle library to just invoke it directly.
- Rewrite the RLE method so that it is 100% correct.
Off to work I went. That part about lifting the existing VMD decoder functions out of their libavcodec nest turned out to not be that straightforward. As an alternative, I modified the decoder to dump the raw frames to an intermediate file. In doing so, I think I was able to avoid the issue of the duplicated frames that plagued the previous efforts.
Also, remember how I was really pleased with the palette conversion technique in which I was able to leverage computer science big-O theory ? By this stage, I had no reason to convert the paletted video to RGB in the first place ; all of the decoding, subtitling and re-encoding operates in the paletted colorspace.
This approach seemed to work pretty well. The final program is subtitle-vmd.c. The process is still a little weird. The modifications in my own FFmpeg fork are necessary to create an intermediate file that the new C tool can operate with.
Next Steps
The Translator has found some assorted bugs and corner cases that still need to be ironed out. Further, for extra credit, I need find the change windows for each frame to improve compression just a little more. I don’t think I will be trying for LZ compression, though.However, almost as soon as I had this whole system working, The Translator informed me that there is another, different movie format in play in the Phantasmagoria engine called ROBOT, with an extension of RBT. Fortunately, enough of the algorithms have been reverse engineered and re-implemented in ScummVM that I was able to sort out enough details for another subtitling project. That will be the subject of a future post.
See Also :
- Subtitling Sierra RBT Files : The followup in which I discuss how to scribble text on the other animation format
The post Subtitling Sierra VMD Files first appeared on Breaking Eggs And Making Omelettes.
-
Subtitling Sierra RBT Files
2 juin 2016, par Multimedia Mike — Game HackingThis is part 2 of the adventure started in my Subtitling Sierra VMD Files post. After I completed the VMD subtitling, The Translator discovered a wealth of animation files in a format called RBT (this apparently stands for “Robot” but I think “Ribbit” format could be more fun). What are we going to do ? We had come so far by solving the VMD subtitling problem for Phantasmagoria. It would be a shame if the effort ground to a halt due to this.
Fortunately, the folks behind the ScummVM project already figured out enough of the format to be able to decode the RBT files in Phantasmagoria.
In the end, I was successful in creating a completely standalone tool that can take a Robot file and a subtitle file and create a new Robot file with subtitles. The source code is here (subtitle-rbt.c). Here’s what the final result looks like :

“What’s in the refrigerator ?” I should note at this juncture that I am not sure if this particular Robot file even has sound or dialogue since I was conducting these experiments on a computer with non-working audio.
The RBT Format
I have created a new MultimediaWiki page describing the Robot Animation format based on the ScummVM source code. I have not worked with a format quite like this before. These are paletted animations which consist of a sequence of independent frames that are designed to be overlaid on top of static background. Because of these characteristics, each frame encodes its own unique dimensions and origin coordinate within the frame. While the Phantasmagoria VMD files are usually 288×144 (which are usually double-sized for the benefit of a 640×400 Super VGA canvas), these frames are meant to be plotted on a game field that was roughly 576×288 (288×144 doublesized).
For example, 2 minimalist animation frames from a desk investigation Robot file :

100×147
101×149As for compression, my first impression was that the algorithm was the same as VMD. This is wrong. It evidently uses an unmodified version of a standard algorithm called Lempel-Ziv-Stac (LZS). It shows up in several RFCs and was apparently used in MS-DOS’s transparent disk compression scheme.
Approach
Thankfully, many of the lessons I learned from the previous project are applicable to this project, including : subtitle library interfacing, subtitling in the paletted colorspace, and replacing encoded frames from the original file instead of trying to create a new file.Here is the pitch for this project :
- Create a C program that can traverse through an input file, piece by piece, and generate an output file. The result of this should be a bitwise identical file.
- Adapt the LZS compression decoding algorithm from ScummVM into the new tool. Make the tool dump raw Portable NetMap (PNM) files of varying dimensions and ensure that they look correct.
- Compress using LZS.
- Stretch the frames and draw subtitles.
- More compression. Find the minimum window for each frame.
Compression
Normally, my first goal is to decompress the video and store the data in a raw form. However, this turned out to be mathematically intractable. While the format does support both compressed and uncompressed frames (even though ScummVM indicates that the uncompressed path is yet unexercised), the goal of this project requires making the frames so large that they overflow certain parameters of the file.A Robot file has a sequence of frames and 2 tables describing the size of each frame. One table describes the entire frame size (audio + video) while the second table describes just the video frame size. Since these tables only use 16 bits to specify a size, the maximum frame size is 65536 bytes. Leaving space for the audio portion of the frame, this only leaves a per-frame byte budget of about 63000 bytes for the video. Expanding the frame to 576×288 (165,888 pixels) would overflow this limit.
Anyway, the upshot is that I needed to compress the data up front.
Fortunately, the LZS compressor is pretty straightforward, at least if you have experience writing VLC-oriented codecs. While the algorithm revolves around back references, my approach was to essentially write an RLE encoder. My compressor would search for runs of data (plentiful when I started to stretch the frame for subtitling purposes). When a run length of n=3 or more of the same pixel is found, encode the pixel by itself, and then store a back reference of offset -1 and length (n-1). It took a little while to iron out a few problems, but I eventually got it to work perfectly.
I have to say, however, that the format is a little bit weird in how it codes very large numbers. The length encoding is somewhat Golomb-like, i.e., smaller values are encoded with fewer bits. However, when it gets to large numbers, it starts encoding counts of 15 as blocks of 1111. For example, 24 is bigger than 7. Thus, emit 1111 into the bitstream and subtract 8 from 23 -> 16. Still bigger than 15, so stuff another 1111 into the bitstream and subtract 15. Now we’re at 1, so stuff 0001. So 24 is 11111111 0001. 12 bits is not too horrible. But the total number of bytes (value / 30). So a value of 300 takes around 10 bytes (80 bits) to encode.
Palette Slices
As in the VMD subtitling project, I took the subtitle color offered in the subtitle spec file as a suggestion and used Euclidean distance to match to the closest available color in the palette. One problem, however, is that the palette is a lot smaller in these animations. According to my notes, for the set of animations I scanned, only about 80 colors were specified, starting at palette index 55. I hypothesize that different slices of the palette are reserved for different uses. E.g., animation, background, and user interface. Thus, there is a smaller number of colors to draw upon for subtitling purposes.Scaling
One bit of residual weirdness in this format is the presence of a per-frame scale factor. While most frames set this to 100 (100% scale), I have observed 70%, 80%, and 90%. ScummVM is a bit unsure about how to handle these, so I am as well. However, I eventually realized I didn’t really need to care, at least not when decoding and re-encoding the frame. Just preserve the scale factor. I intend to modify the tool further to take scale factor into account when creating the subtitle.The Final Resolution
Right around the time that I was composing this post, The Translator emailed me and notified me that he had found a better way to subtitle the Robot files by modifying the scripts, rendering my entire approach moot. The result is much cleaner :

Turns out that the engine supported subtitles all along
It’s a good thing that I enjoyed the challenge or I might be annoyed at this point.
See Also
- Subtitling Sierra VMD Files : My effort to subtitle the main FMV files found in Sierra games.
The post Subtitling Sierra RBT Files first appeared on Breaking Eggs And Making Omelettes.